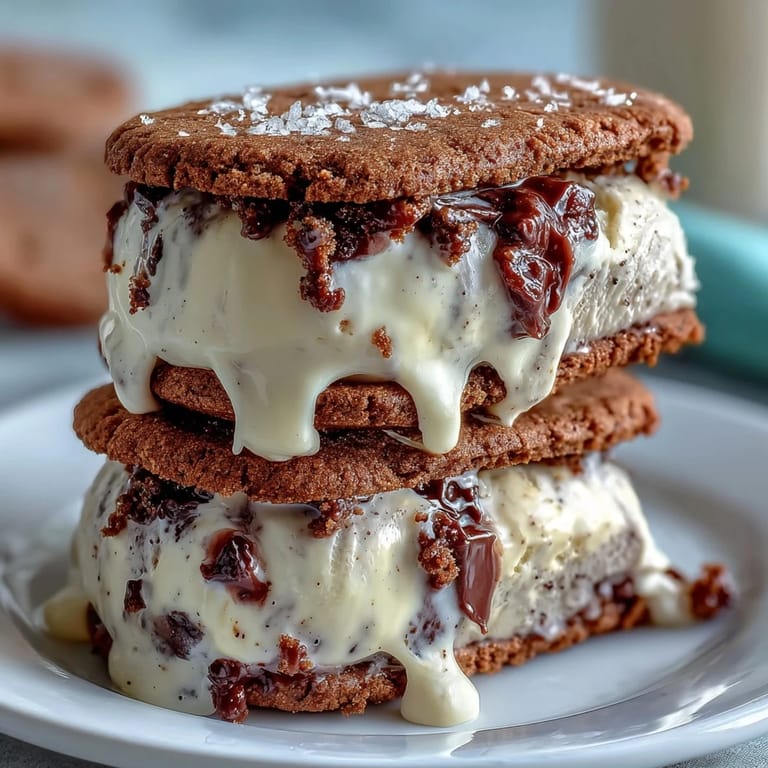
 Pin it
 There's a specific afternoon I can't shake from my memory—standing in line at a coffee shop on one of those sweltering days when the AC had given up, watching someone order a vanilla frappuccino with extra whipped cream. The barista handed it over, and I noticed how the customer's face just lit up at that first sip, like they'd transported themselves somewhere cool and perfect. That moment stuck with me, and eventually I wondered: what if I could capture that exact feeling but make it into something you could hold in your hands and bite into? These ice cream sandwiches are the answer—rich espresso cookies cradling silky vanilla bean ice cream, delivering that beloved coffee shop experience in every single bite.
I made these for the first time on a random Tuesday evening when my neighbor stopped by with fresh vanilla beans from her garden. She'd been traveling and brought them back as a gift, and I felt this rush to use them before they dried out. We ended up making the entire batch together, and she stayed through the whole process—from heating the cream to cutting out cookies to that satisfying moment when we pressed the first sandwich together. She took one bite and immediately asked for the recipe, but honestly, I think what she loved most was that we'd made something from scratch that felt fancy enough for a real dessert menu.
Ingredients
- Unsalted butter, softened (1 cup): This is your foundation for tender cookies—room temperature butter creams up into a cloud that traps tiny air pockets, making the final texture light and snappy.
- Packed brown sugar (1 cup) and granulated sugar (1/2 cup): The combination gives you deep molasses notes from the brown sugar while the white sugar keeps edges crispy; don't skip either one.
- Large eggs (2): These bind everything together and add moisture that balances the cocoa's drying effect.
- Vanilla extract (2 tsp): A small amount goes a long way, but don't use the imitation stuff here—real vanilla makes a noticeable difference.
- All-purpose flour (2 1/2 cups) and unsweetened cocoa powder (1/2 cup): The cocoa gives deep chocolate undertones that complement rather than overpower the espresso flavor.
- Instant espresso powder (2 tbsp): This is the secret weapon that makes people ask "what's that incredible flavor?"—it's concentrated coffee without the liquid, so it won't mess with your dough texture.
- Baking soda (1 tsp) and salt (1/2 tsp): Baking soda reacts with the brown sugar's acidity to help cookies spread and crisp at the edges, while salt amplifies every other flavor.
- Heavy cream (2 cups) and whole milk (1 cup): This ratio creates ice cream that's rich but still scoopable; too much cream makes it icy, too little and it's just frozen milk.
- Granulated sugar (3/4 cup): Dissolves directly into the cream base without any grittiness if you heat it properly.
- Vanilla bean (1 whole bean, split and scraped, or 2 tsp vanilla bean paste): Real vanilla beans create those gorgeous black specks and deliver complexity you simply can't get from extract alone—worth the splurge for this dessert.
- Pinch of salt: A tiny amount in ice cream rounds out the vanilla sweetness and prevents it from tasting one-dimensional.
Tired of Takeout? 🥡
Get 10 meals you can make faster than delivery arrives. Seriously.
One email. No spam. Unsubscribe anytime.
Instructions
- Warm the ice cream base gently:
- Pour milk and sugar into a medium saucepan, then add your vanilla bean seeds and the pod itself (the pod releases subtle flavor). Heat over medium, watching until steam rises and the sugar dissolves completely—you want it steaming, not boiling, or you'll accidentally make scrambled cream. Remove from heat, discard the vanilla pod, then stir in the heavy cream and a pinch of salt.
- Chill thoroughly:
- Transfer your mixture to the refrigerator and let it sit undisturbed for at least two hours, ideally overnight. This matters more than you'd think—cold base churns into smoother ice cream with smaller ice crystals.
- Churn until billowy:
- Follow your ice cream maker's instructions, but watch for the moment when it goes from liquid to soft-serve consistency, with a slight resistance when you stir. Spread the churned ice cream into a parchment-lined 9x13-inch pan to about an inch thick, then freeze solid for at least two hours.
- Cream butter and sugars together:
- In a large bowl with an electric mixer, beat softened butter with both sugars until the mixture is pale, fluffy, and looks almost mousse-like—this takes about three minutes of steady beating. You're incorporating air that makes cookies tender.
- Integrate eggs and vanilla:
- Add eggs one at a time, beating well after each addition so they emulsify smoothly into the butter mixture rather than looking separated and curdled. Stir in vanilla extract until just combined.
- Mix dry ingredients separately:
- In another bowl, whisk together flour, cocoa powder, espresso powder, baking soda, and salt. This distributes the leavening and espresso powder evenly so you don't get any bitter pockets.
- Bring wet and dry together:
- Gently fold the dry mixture into the wet mixture using a spatula or wooden spoon, stirring just until no flour streaks remain. Overmixing develops gluten and makes cookies tough.
- Roll out cookie dough:
- Divide the dough in half. Place each half between two sheets of parchment paper and roll to about a quarter-inch thickness—you want them thin enough to be snappy but thick enough to hold the ice cream. A quarter-inch is the sweet spot.
- Cut and bake:
- Using a 3-inch round cutter, punch out 16 cookies and transfer them to parchment-lined baking sheets. Bake at 350°F for 10 to 12 minutes—they'll look just set around the edges but still tender in the center when you pull them out.
- Cool completely:
- Let cookies rest on the baking sheet for a minute so they firm up slightly, then transfer to a wire rack. They'll continue to set as they cool and will crisp up further.
- Cut ice cream into rounds:
- Remove your frozen ice cream slab from the pan and use the same 3-inch cutter to cut out eight perfect rounds. If the cutter sticks, dip it in warm water and wipe it dry between cuts.
- Assemble with care:
- Place one ice cream round between two cookies and press gently so they hold together without squishing the ice cream out the sides. Wrap each sandwich in parchment paper and return to the freezer for at least an hour so everything sets into a unified treat.
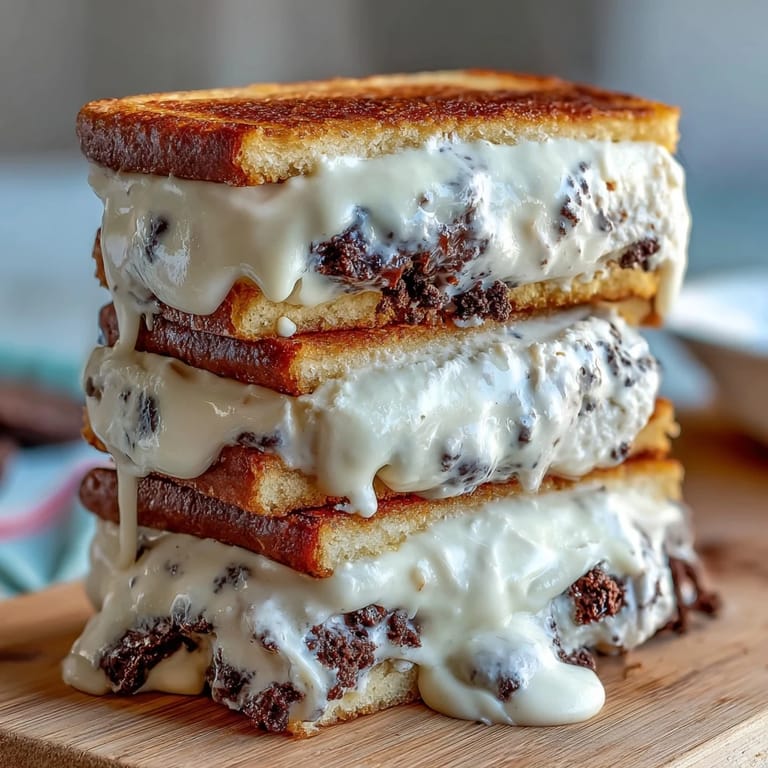 Pin it
 The magic moment came when I served these to my family after a summer dinner, and my dad—who's usually skeptical about homemade desserts—took one bite and went quiet. Not in a disappointed way, but in that stunned silence where you can tell something tastes exactly like what you wanted but didn't know you could make at home. He asked for seconds immediately, and my mom started wrapping extras in foil for the freezer.
When Store-Bought Won't Cut It
There's a real difference between grabbing a frozen treat at the grocery store and holding something you've made with actual vanilla beans and freshly baked cookies. Store-bought versions often have that waxy mouthfeel or taste vaguely of vanilla without any real depth. These sandwiches have texture—the cookies actually snap between your teeth instead of getting soggy immediately, and the ice cream tastes like cream and vanilla rather than sweetness and air. Once you've experienced homemade, going back feels impossible.
The Espresso-Vanilla Balance
The espresso powder is subtle but essential—it doesn't make these taste like coffee, but rather amplifies the chocolate notes in the cookies while creating a sophisticated backdrop for the vanilla ice cream. Think of it as the espresso flavor working behind the scenes rather than taking center stage. If you're sensitive to coffee flavors, start with 1.5 tablespoons instead of 2 and taste-test a cookie before committing to the full batch.
Elevating the Finish
The plain sandwich is already stunning, but there's room for personality here. After pressing the cookies around the ice cream, the edges are still slightly soft, which is the perfect moment to add texture if you want it.
- Roll the sandwich edges in mini chocolate chips, crushed espresso beans, or even finely chopped toasted nuts before the final freeze.
- You can also dip the edges in melted dark chocolate and let it set—this creates a sophisticated shell that cracks satisfyingly when you bite.
- Keep the plain version on hand too, because sometimes the purest version of a good thing needs nothing added.
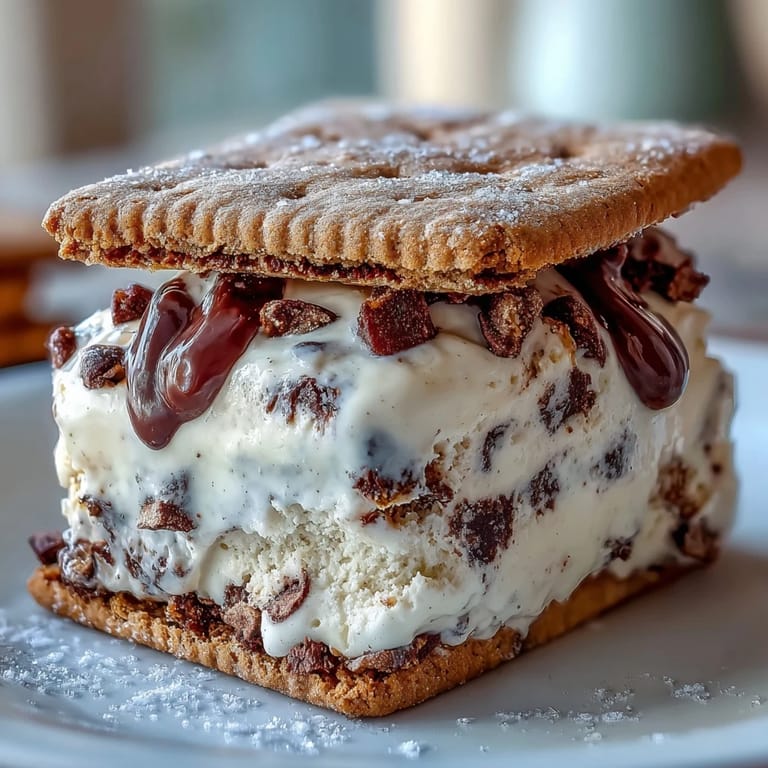 Pin it
 These sandwiches have become my answer to the question of what to bring when you want to impress someone without spending hours in the kitchen. They're impressive enough for dinner parties but simple enough that you can actually enjoy making them.
Recipe FAQs
- → How do I make the vanilla bean ice cream base?
Heat milk, sugar, vanilla bean seeds and salt until sugar dissolves, remove from heat, stir in heavy cream, chill, then churn until creamy.
- → What ingredients give the cookies their espresso flavor?
Instant espresso powder combined with unsweetened cocoa powder imparts a rich espresso taste to the cookies.
- → Can I prepare the ice cream without a machine?
Yes, freeze the mixture in a shallow dish, stirring every 30 minutes until smooth and creamy.
- → How should the sandwiches be stored before serving?
Wrap each sandwich in parchment and freeze for at least one hour to set firmly before enjoying.
- → What are some optional finishing touches?
Roll sandwich edges in mini chocolate chips or crushed espresso beans for added texture and flavor.